Master Make-Ahead Biscuits: Quick Breakfasts Made Easy
Imagine waking up to the aroma of freshly baked biscuits without the morning rush. No frantic mixing, no messy flour-dusted counters when you're half-asleep. This isn't a dream; it's the reality offered by a brilliant simple make-ahead biscuits recipe. It’s the ultimate secret weapon for busy households, transforming chaotic mornings into calm, delicious beginnings. Whether you're a parent bracing for the back-to-school season, a professional seeking a convenient breakfast solution, or simply someone who loves the comfort of homemade food, mastering this technique will revolutionize your kitchen routine.
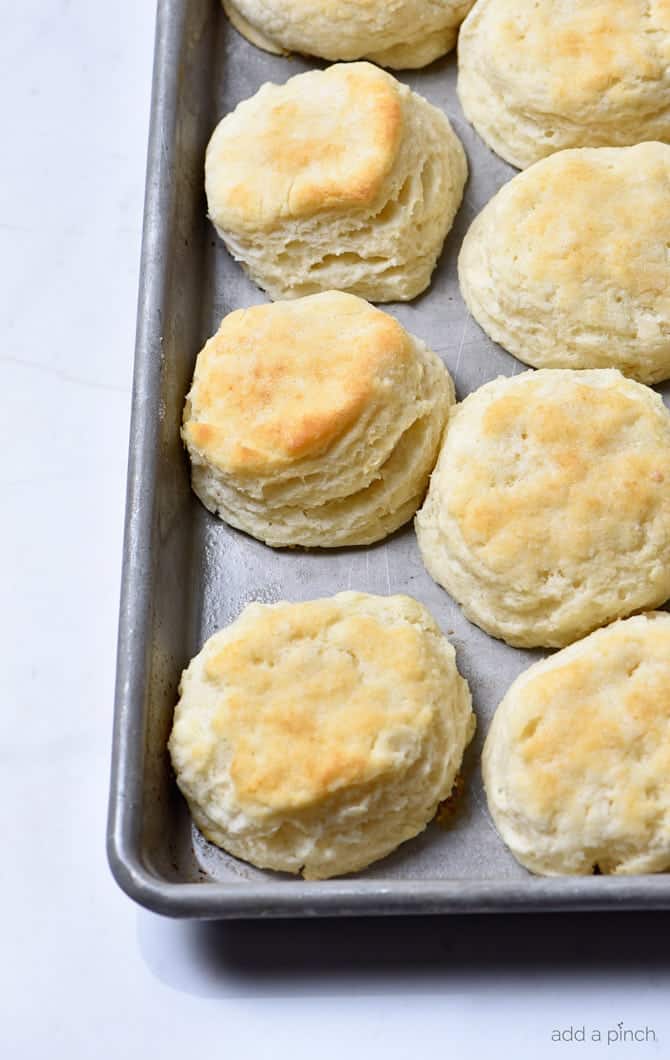
Baking biscuits from scratch typically takes about 20 minutes, a small window of time that often feels like an eternity when you're trying to get out the door. That's precisely where the genius of preparing biscuits in advance shines. With just a little planning, you can have a freezer stocked with delectable, ready-to-reheat biscuits, ensuring that a warm, flaky breakfast is always just minutes away. This guide will walk you through everything you need to know to create your own stash of these breakfast lifesavers, making every morning a little bit easier and a whole lot tastier.
Why a Make-Ahead Biscuits Recipe is Your Ultimate Morning Game Changer
The concept of making and baking biscuits ahead of time might sound revolutionary, but it's a practical strategy that experienced home cooks swear by. It’s not just about saving time; it’s about reducing stress, improving the quality of your meals, and even saving money. Here’s why this make ahead biscuits recipe method will earn a permanent spot in your culinary repertoire:
- Time-Saving & Stress-Reducing: This is the most obvious benefit. Instead of dedicating precious morning minutes to mixing, cutting, and baking, you simply pull a few biscuits from the freezer and reheat. This is especially invaluable on hectic weekdays or when unexpected guests drop by.
- Consistent Quality: By preparing a larger batch when you have ample time and energy, you can ensure each biscuit is made with care. This leads to perfectly flaky, tender results every single time, far superior to anything you'd hastily assemble at dawn.
- Cost-Effective & Customizable: Store-bought biscuit dough can be convenient, but it often comes with a higher price tag and a list of ingredients you can't pronounce. Making your own from scratch is not only cheaper but also allows you to control the ingredients and customize flavors to your heart's content. Say goodbye to the need for homemade freezer biscuits: flaky perfection beyond store-bought options.
- Fueling Busy Schedules: Think about high school students rushing off to class, parents juggling multiple responsibilities, or anyone needing a quick, satisfying start to their day. A warm, homemade biscuit offers comfort and sustenance that a bowl of cold cereal can’t match. It’s a simple act of love and preparation that goes a long way.
It's a clever trick, one that even grandmas renowned for their biscuit-making prowess will appreciate and perhaps even adopt!
Crafting Your Perfect Batch: The Foundation of Delicious Make-Ahead Biscuits
The beauty of a make ahead biscuits recipe lies in its flexibility and simplicity. The process starts with a reliable biscuit recipe, and then it’s all about smart preparation.
Choosing Your Biscuit Base
You don't need an overly complicated recipe to achieve fantastic results. Simplicity is often key:
- Three-Ingredient Buttermilk Biscuits: A classic for a reason, offering a tangy flavor and incredibly tender crumb. This recipe typically uses self-rising flour, cold butter, and buttermilk.
- Two-Ingredient Cream Biscuits: For an even quicker option, cream biscuits made with self-rising flour and heavy cream are unbelievably easy and yield a rich, delicate texture.
Both of these foundational recipes work exceptionally well for the make-ahead method, ensuring your freezer stash is always a hit.
Beyond the Basics: Customization is Key
Once you’ve baked your initial batch of biscuits, the real fun begins – personalizing them for ultimate convenience. This step transforms plain biscuits into ready-to-go breakfast sandwiches or savory snacks:
- Sausage Biscuits: While your biscuits are baking, cook up a batch of your favorite breakfast sausage. Once both are cooled, assemble the sausage into the biscuits. You can even add a slice of cheese for a complete grab-and-go meal.
- Cheese Biscuits: Love a cheesy kick? Simply grate your favorite cheese (cheddar, Monterey Jack, or a sharp provolone work wonderfully) and incorporate it into your biscuit dough before baking. This yields savory biscuits perfect on their own or with a fried egg.
- Herb & Garlic: For a savory side or an addition to dinner, fold in fresh chopped herbs like rosemary or chives, along with a touch of garlic powder, into your dough.
- Sweet Variations: While often savory, don't shy away from sweet additions like cinnamon sugar swirled in, or even dried fruit like cranberries or raisins.
Always leave some plain, though! These versatile biscuits are perfect for slathering with homemade jam, apple butter, or smothered in rich gravy.
Mastering the Freeze: Storage and Longevity
The success of your make ahead biscuits recipe hinges on proper cooling and careful storage. Skipping these crucial steps can lead to freezer burn and a less-than-ideal biscuit experience.
Cooling is Crucial
Once your biscuits are baked and out of the oven, it is absolutely essential to allow them to cool completely. This means until they are no longer warm to the touch, both inside and out. Placing warm biscuits directly into the freezer will create condensation, which then turns into ice crystals, leading to freezer burn and a soggy texture upon reheating.
The Art of Wrapping
Effective wrapping is your best defense against freezer burn:
- Individual Wrap: For best results, wrap each cooled biscuit individually. Freezer paper is excellent for this, as it creates a moisture-resistant barrier. Alternatively, plastic wrap can be used, ensuring it’s tightly sealed around the biscuit.
- Airtight Bag: Once individually wrapped, place the biscuits into a heavy-duty, sealable freezer bag. Press out as much air as possible before sealing. You can also use an airtight freezer-safe container.
Labeling for Success
Don't underestimate the power of a good label! Clearly mark your freezer bag or container with the following information:
- Contents: "Plain Biscuits," "Sausage & Cheese Biscuits," etc.
- Date: The date you prepared and froze them. This helps you keep track of freshness and ensures you rotate your stock.
When properly stored, your baked and frozen biscuits can last for up to 2-3 months in the freezer without a significant loss in quality. This gives you plenty of time to enjoy your ready-made breakfast solutions.
From Freezer to Table: Reheating for Perfection
Now for the satisfying part: transforming your frozen masterpieces into warm, flaky delights. The goal is to reheat them thoroughly while maintaining their tender interior and crisp exterior.
Oven Reheating (Recommended for Best Texture)
The oven is often the best choice for reheating biscuits, as it helps restore that fresh-baked crispness.
- Preheat your oven to 300-325°F (150-160°C).
- Place the frozen biscuits directly on a baking sheet. There’s no need to thaw them first.
- Heat for 15-20 minutes, or until warmed through and slightly golden on the outside. Times may vary depending on the size of your biscuits and whether they have fillings.
Air Fryer Reheating (Quick & Efficient)
For speed and convenience, an air fryer is a fantastic tool for bringing your make-ahead biscuits back to life.
- Preheat your air fryer to 300°F (150°C).
- Place a few frozen biscuits in a single layer in the air fryer basket, ensuring they don't overlap.
- Cook for 8-12 minutes, flipping halfway through, until heated through and crisp. Keep an eye on them, as air fryer temperatures can vary.
Microwave Reheating (Fastest, but with a Caveat)
While the microwave is the quickest option, it can sometimes lead to a softer, less crispy texture. Use it when speed is paramount.
- Place a frozen biscuit on a microwave-safe plate.
- Heat for 30-60 seconds, or until warm. For a slightly better texture, wrap the biscuit in a damp paper towel before microwaving to add some moisture.
Once reheated, serve your biscuits immediately. They're perfect with a dollop of butter and jam, alongside scrambled eggs, or as the base for a hearty breakfast sandwich. The possibilities are truly endless!
Conclusion
Embracing a make ahead biscuits recipe is more than just learning a new technique; it's adopting a lifestyle of convenience, quality, and culinary confidence. From freeing up precious morning minutes to ensuring a delicious, homemade breakfast is always within reach, the benefits are undeniable. With a few simple ingredients, a little bit of planning, and the clever freezing method outlined here, you can transform your busy mornings into moments of delightful ease. So, take a rainy afternoon, gather your ingredients, and bake up a few batches. Your future self (and your family) will thank you for the comforting taste of warm, flaky biscuits, ready at a moment's notice.
